Follow Me on Pinterest

Tuesday, December 18, 2012

Russian Tea Cakes

Also known as "Wedding Cookies". This is my mother-in-laws recipe and my first attempt at baking them. A co-worker and friend gathered on Sunday to bake and put together Christmas goodie boxes for fellow physicians and their staff members. We made a variety of treats, including these Russian Tea Cakes. They looked great in the boxes and tasted like the ones we had as children. Enjoy!

The Ingredients:
1 cup soft butter
1/2 cup powdered sugar
1 teaspoon vanilla
2 1/2 cups all purpose flour
1/4 teaspoon salt
3/4 cup pecans chopped fine in a chopper

Preheat your oven to 400 degrees F. Cream together the first two ingredients, add the vanilla and then stir in the flour and salt. Add the nuts and mix well. Roll into 1" balls and place on a cookie sheet. (These will not expand so they can be placed close together). Bake for 12 minutes. After removing from oven roll each ball into the powdered sugar while hot. Set aside and let them completely cool and then roll each ball in the powdered sugar again.

Yields approximately 4 dozen.


Share/Bookmark

Friday, December 14, 2012

White Chocolate Candy Cane Martini

'Tis The Season...for fabulous holiday drinks!  Recently at a local restaurant I was served a Candy Cane Martini.  Instantly, I was hooked and searching for a recipe so that I could enjoy this drink in the comfort of my own home.  The recipe I am using originated from One Martini At A Time.  I am actually sipping on one as I blog...yum!  Sit back, relax, and enjoy this Ridiculously Delicious Holiday Drink.  You deserve it!

Makes Two Drinks

The Spirits:
2 ounces of Vodka
1 ounce of Peppermint Schnapps
4 ounces of a White Chocolate Liqueur
3 ounces of half and half
Mini candy cane for garnish
Red sugar sprinkles for cuteness

In a cocktail shaker combine the spirits and half and half with ice, shake and strain into a martini glass.  Garnish your glass with the miniature candy cane and sprinkle in some red sugar sprinkles for a little extra Christmas.


Share/Bookmark

Thursday, December 13, 2012

The Great Food Blogger Swap 2012: Cake Batter Chocolate Chip Cookies

This year I was excited to be able to participate in The Great Food Blogger Cookie Swap.  Money collected by each participate went to support Kid's Cancer through the organization Cookies For Kids Cancer.  The cookie swap was a really fun event in that I received names and addresses of three fellow bloggers, and three bloggers received all of my information.  No one knew who got who's name until you received your packages of cookies in the mail.  As the deadline grew closer my boys waited patiently for our cookies to arrive and once they did we were treated to some delicious tasting treats and I have been introduced to some pretty amazing bloggers.

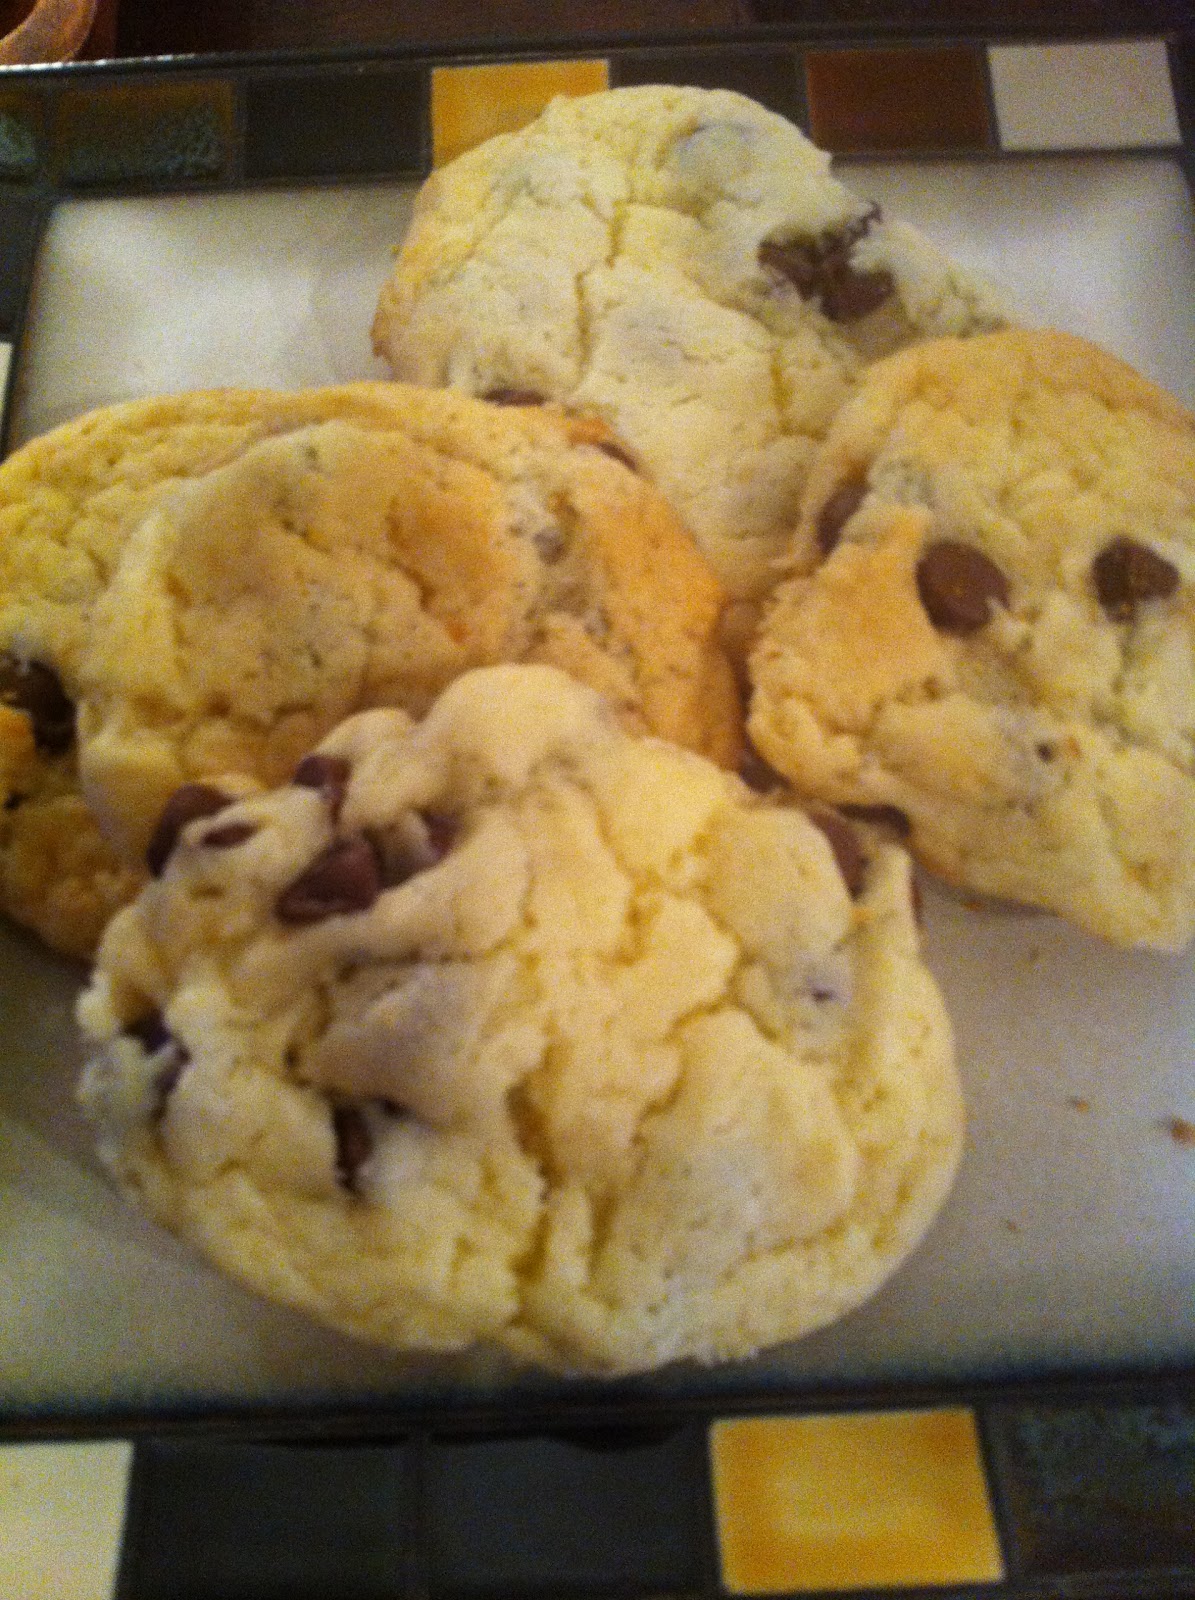
The cookies I made, packaged and mailed were Cake Batter Chocolate Chip Cookies.  The recipe I used was a new to me recipe that I discovered from the blog Six Sisters' Stuff.  Not only are they the easiest cookies to make, they are very yummy too!

For these cookies you will need:
1 (18.25 oz) box cake mix, any flavor
1 tsp. baking powder
2 eggs
1/2 cup vegetable oil
1 cup semisweet chocolate chips

Preheat your oven to 350 degrees F.  In a medium bowl, stir together the cake mix and baking powder.  Add the eggs and oil.  Mix until blended well and then stir in the chocolate chips.  Drop by rounded spoonfuls onto cookie sheet and bake for 10 minutes.  Let cool on pan for 5 minutes before transferring to a wire rack to cool completely.


Be sure to check out these fabulous blogs that have been introduced to me through The Great Food Blogger Cookie Swap:

Meet Claire at www.claireknudsen.wordpress.com (your chocolate-peppermint cookies are delicious!)
Carrie can be found at  www.kissmywhisk.com (the Chewy Pumpkin Cookies with Chocolate and Caramel were AMAZING!)
Kelli blogs at www.thecornerkitchen.blogspot.com (the Snickerdoodles with White Chocolate Chunks instantly disappeared!)
Say Hi to Toni at www.atasteofalaska.blogspot.com
Laura's blog is www.ringfingertanline.com
Stephanie can be found at www.munchimunch.blogspot.com 

A HUGE Thank You to Love and Olive Oil and The Little Kitchen for organizing the event!  Now, what to bake next year...
Share/Bookmark

Wednesday, December 12, 2012

Raspberry Santa Hats

So once again it was time for our family to provide snack to 35 little munchkins at Jaxon's pre-school. Since it was December I decided to make a basic chex mix with rice cereal, goldfish, pretzels and M&M's along with some precious little raspberry Santa hats! Strawberries would work beautifully, but in December in Wyoming those are impossible to find.


To make these cute little hats I pipped a small amount of Pillsbury peppermint icing into the bottom of mini silver cupcake papers, placed a fresh red raspberry on the top of the icing and then pipped a small ball on the top to the raspberry to finish off the hat. I placed them in the refrigerator over night so the icing would firm up a bit and to keep the raspberries cold and fresh.
Share/Bookmark

Friday, December 7, 2012

Homemade Strawberry Jam

Here we go.  Another 2012 DIY project I was able to cross off my list this year.  Homemade Strawberry Jam.  This Summer, from Bountiful Baskets, I purchased a large amount of strawberries at a very cheap price.  I made jam, a topping for strawberry shortcakes which I froze, cut up and froze strawberries, kept for some for snacks and even made the cutest strawberry ice for fruity summer drinks.  This Strawberry Jam was a huge hit and my most favorite part about this particular recipe is that you do not use Pectin. It is completely natural!  I had never made jam before and after looking at several recipes, most of them containing pectin, I wondered how this one would gel or set, but it did and it tasted amazing!

This recipe was found at Scientficially Sweet.  Hop on over there and check out more delicious recipes!

The THREE Ingredients:
1 lb strawberries, quartered
3/4 cup granulated sugar (don't skimp on this)
2 TBS fresh squeezed lemon juice

How To Make It:
Place strawberries in a large sauce pot over medium-low heat.  Cover and cook gently until they begin to release their juices, about 5 minutes.  Stir in the sugar, increase the heat to medium and bring the mixture to a boil.  Reduce heat and simmer until it has thickened, which takes between 10-15 minutes.  Using a potato masher, break down the large pieces of fruit, leaving it a little chunky.  Stir in your freshly squeezed lemon juice (love any excuse to use my grandma's glass juicer) and continue to boil gently until very thick and syrupy (takes about 15-20 minutes).  Be sure to stir often! You will know that the mixture is thick enough when you are able to see the bottom of the pot as you stir and it sets up quickly when dripped onto a cold plate.  If using a candy thermometer, the mixture is done when the temp reaches 215 degrees F.

Immediately pour your jam into a sterilized mason jar and let it seal tightly.  Cool completely before storing in the refrigerator.  Pop an English muffin in the toaster and enjoy! 


Share/Bookmark

Sunday, December 2, 2012

Pumpkin Butter

I had some left over pumpkin from our Thanksgiving dinner and with it I decided to make some pumpkin butter. If you love pumpkin, you will love this butter. It is great on french toast, bagels, wheat toast, in oatmeal, as a dipping sauce for your kids' apple slices or just straight out of the jar by itself. Actually, I think I will have some on a bagel when I am done with this post!

*of note: this makes a small amount, so the picture shown of what I made is a tripled recipe!

What you will need:
1/3 cup canned pumpkin
1/2 tsp cinnamon
1 TBS peanut butter (almond butter would be tasty too. I even added a little extra to give it a more nut butter taste)
1 TBS brown sugar to sweeten
Pinch of salt
Optional: After tasting I decided to add
1/2 TBS of honey. But this is optional.

How to make it:
Combine all ingredients together in a bowl and mix with a spoon. You can use a food processor if you wish. Once combined put in a jar for an store in the refrigerator for up to two weeks.

Share/Bookmark

Saturday, December 1, 2012

Homemade Doggie Treats

December 1, 2012 and I realize I haven't accomplished half of my DYI projects I had set out to try this year. So, this morning I was determined to cross one off of my list. Homemade doggie treats for Roscoe. It was as if he knew they were for him as he was under my feet the entire time I was preparing them. This recipe yields approximately 40 treats. As
for Roscoe, the pickiest dog I've ever seen, he gives them two paws up!

What you need:
1/2 cup peanut butter
1/4 cup honey
1 cup chicken broth
1 tablespoon olive oil
2 cups all purpose flour
1 cup oats (I used quick oats)

Preheat oven to 350 degrees. Whisk together the peanut butter, honey, oil and chicken broth. Add in the dry ingredients and combine. Roll out the mixture onto a floured surface, about 1/4" thick. Using a cookie cutter (I used candy cane shaped, but little dog bones would be cute) cut out your treats and place on a cookie sheet lined with parchment paper. Continue to re-roll scraps to get as many treats as possible. Bake for 15 minutes and cool on wire rack. Store in an air tight container.

Share/Bookmark